Product Tour
See exactly how Rostersmith works, from roster generation to staff transparency.
01
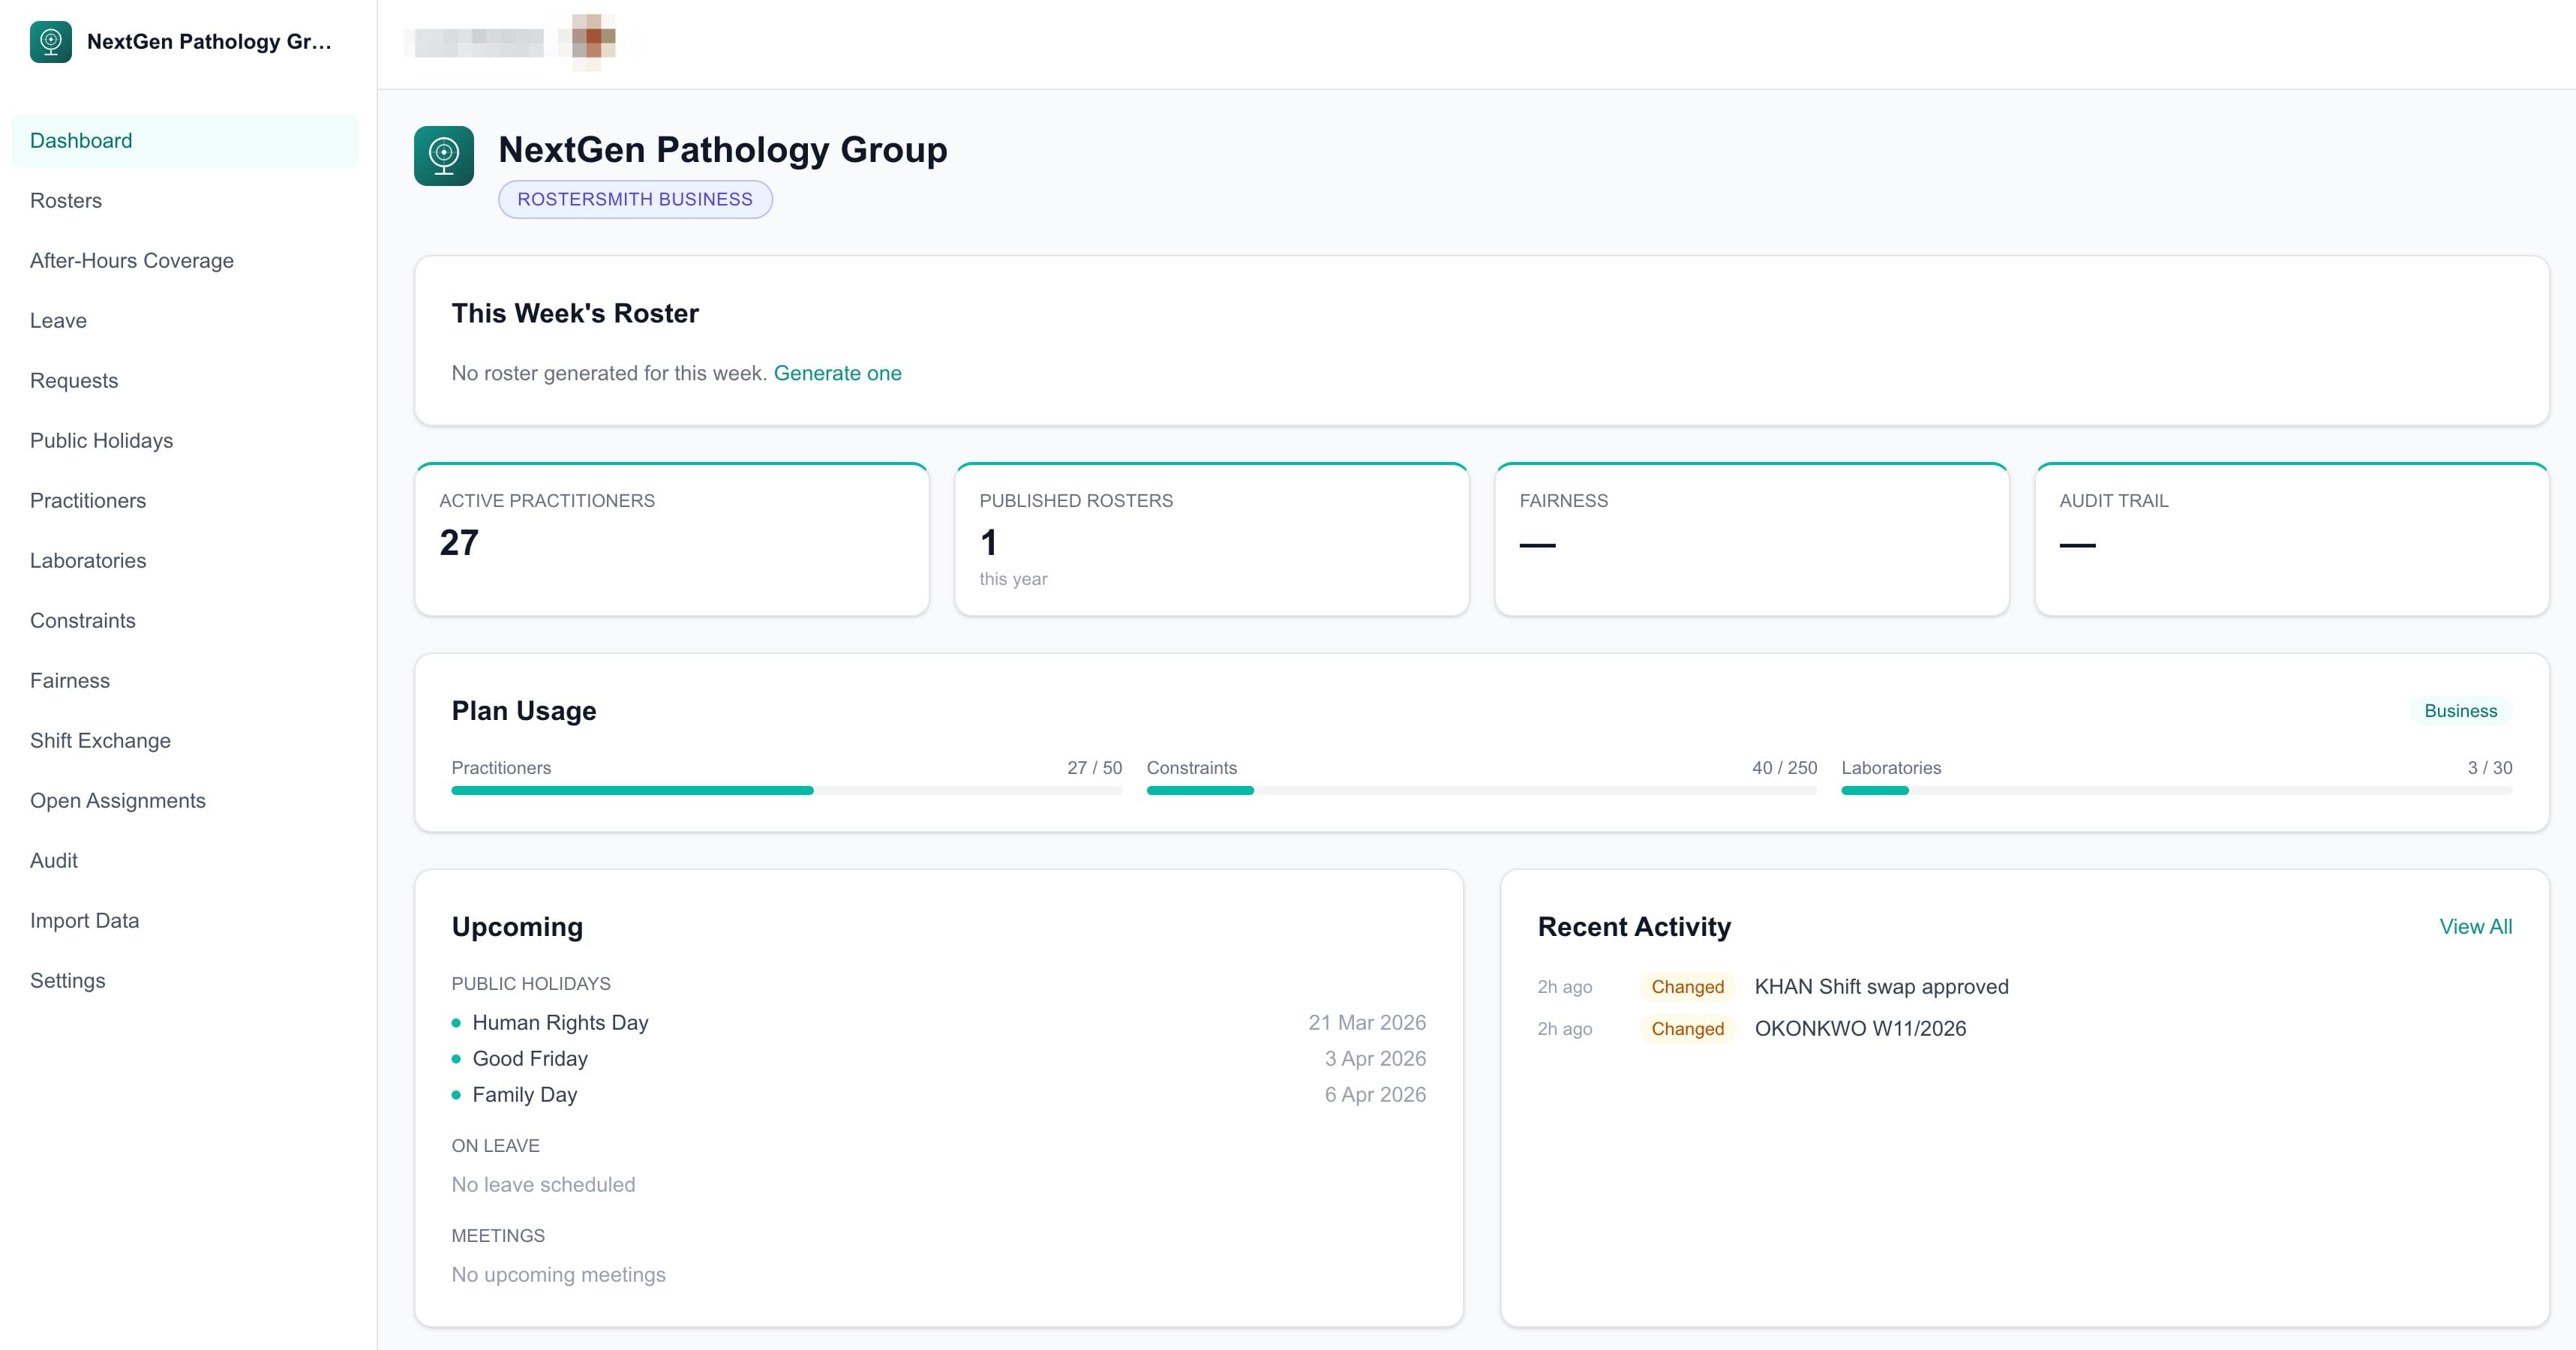
The Dashboard
Your command centre. See this week's roster at a glance, track plan usage, view upcoming public holidays and monitor recent activity. Everything your practice needs on one screen.
02
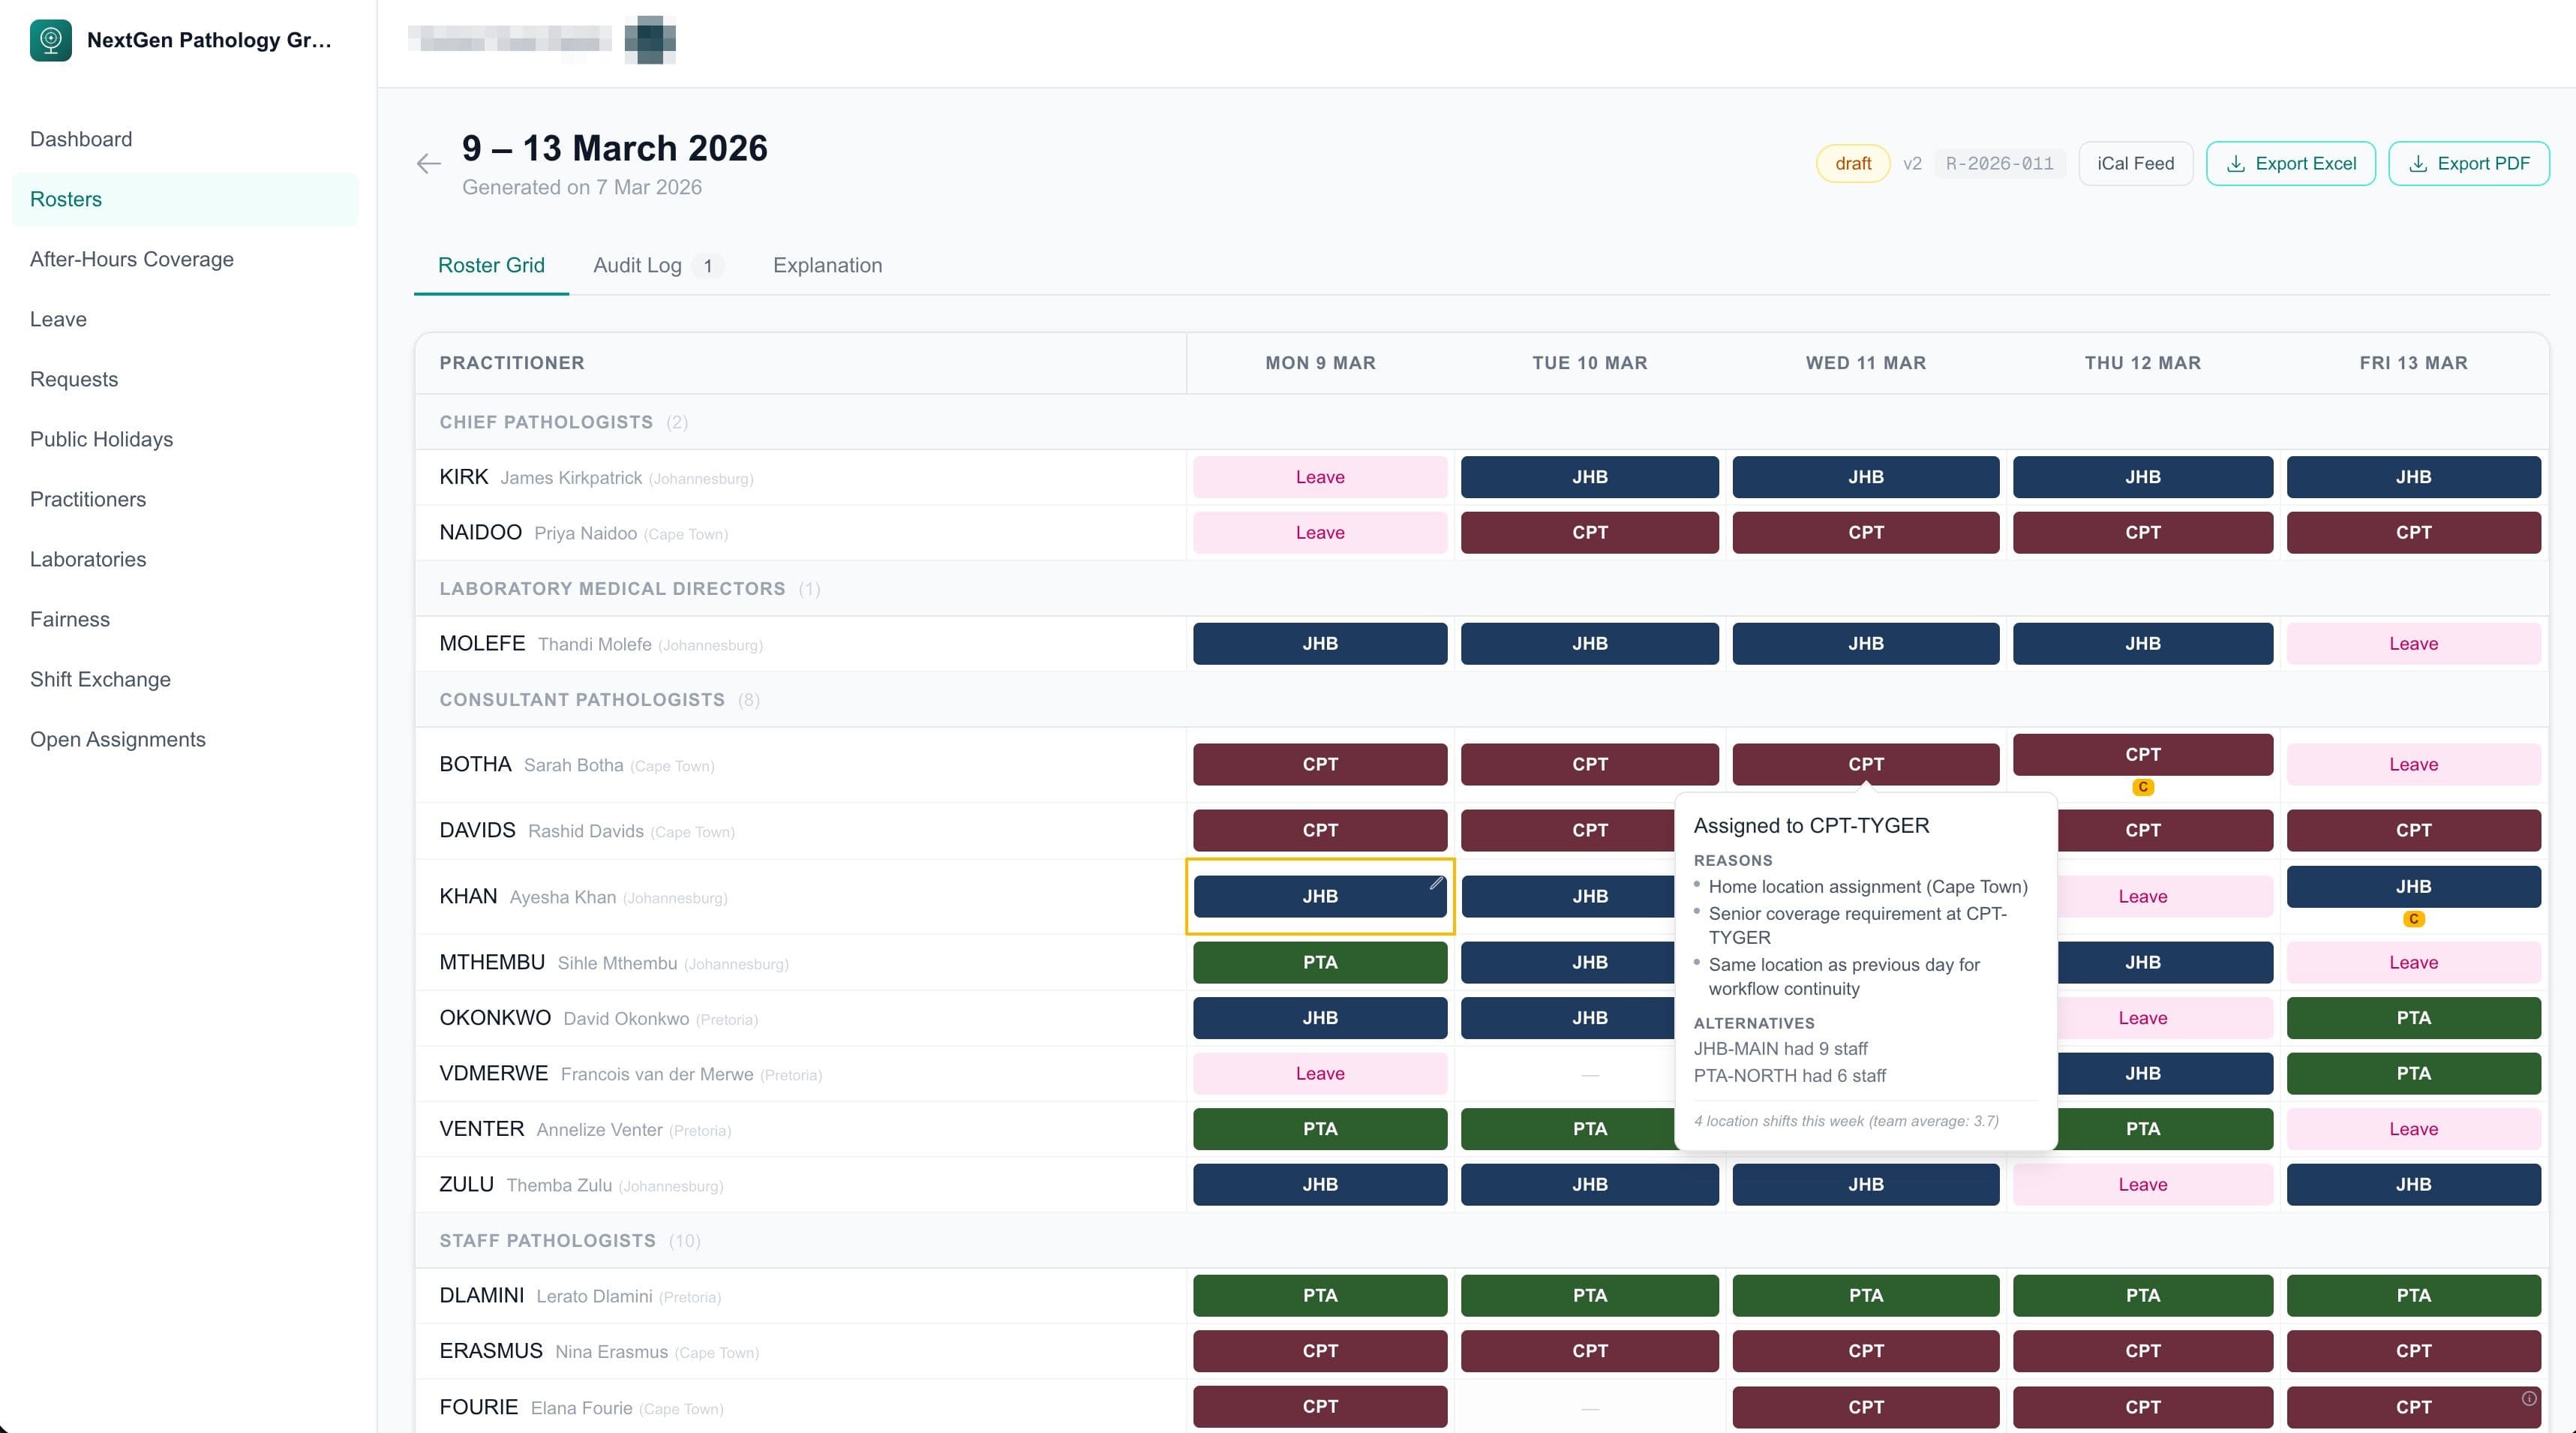
The Roster Grid
Practitioners down the left, days across the top. Colour-coded by location. Grouped by seniority. Click any cell to edit. One view that shows you everything.

03
Pre-Publish Validation
Before you publish, run a one-click validation. Every requirement, coverage target and fairness metric is checked. Fix issues before your team ever sees them. Green means go.


04
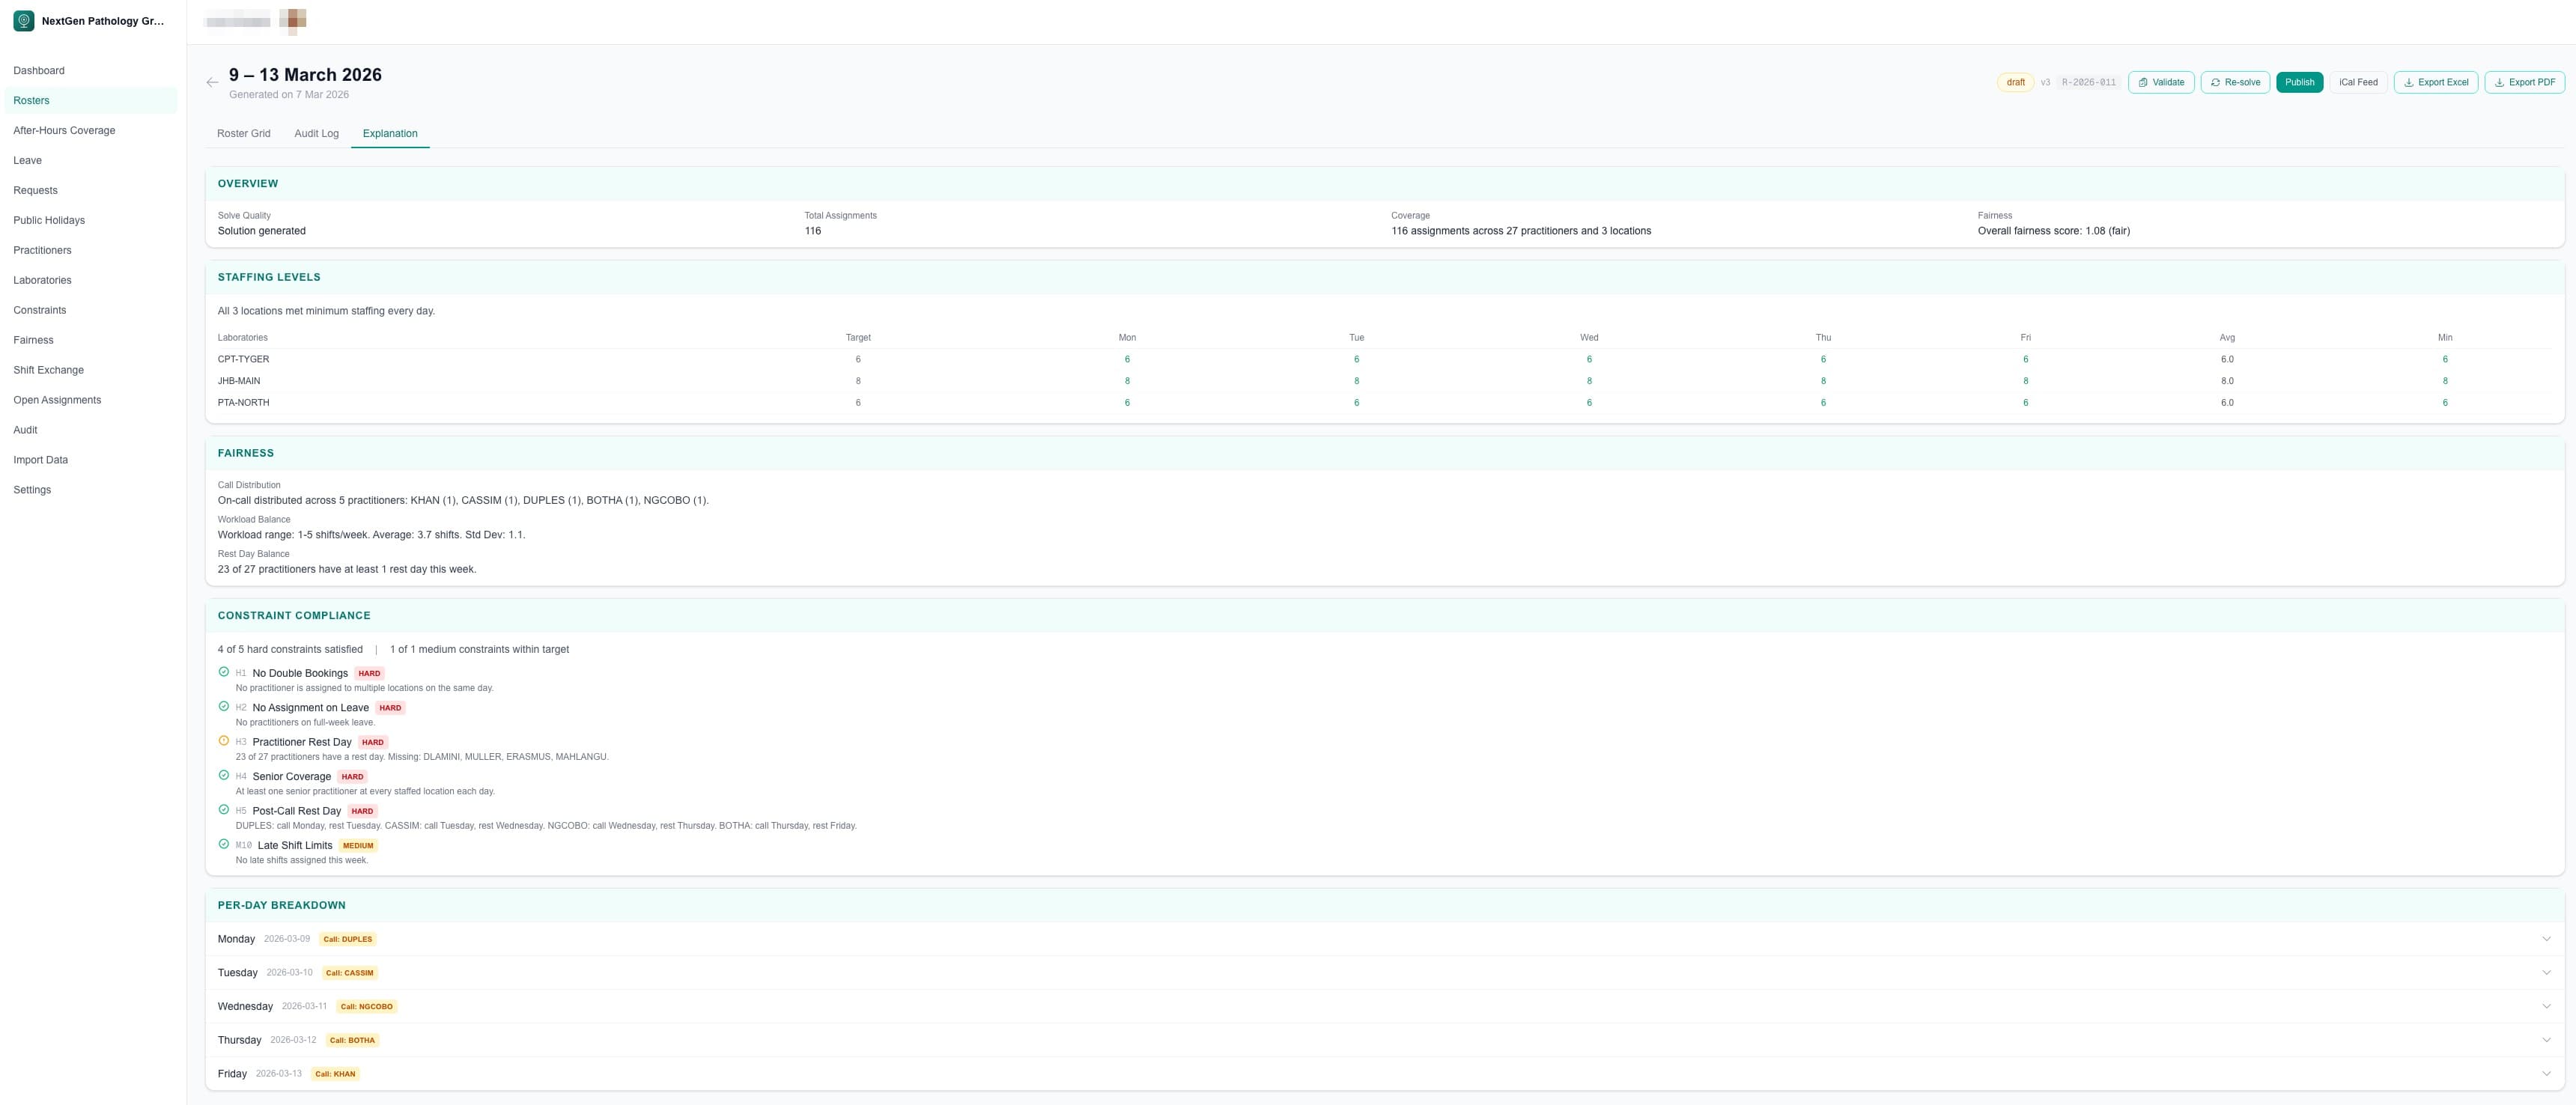
Roster Explanations
Administrators see the full picture: staffing levels, constraint compliance, fairness analysis and per-day breakdowns. Practitioners see their personal schedule with plain-language reasons for every assignment.

05
Cell-Level Transparency
Hover over any cell and click the info icon. See exactly why that practitioner was assigned to that location on that day. Home location preference, speciality coverage, senior requirements and what alternatives were considered.

06
Manual Editing
Click any cell to open the editor. Change the practitioner, location or assignment type. Lock cells to preserve your decisions during re-solve. Request swaps directly from the grid.

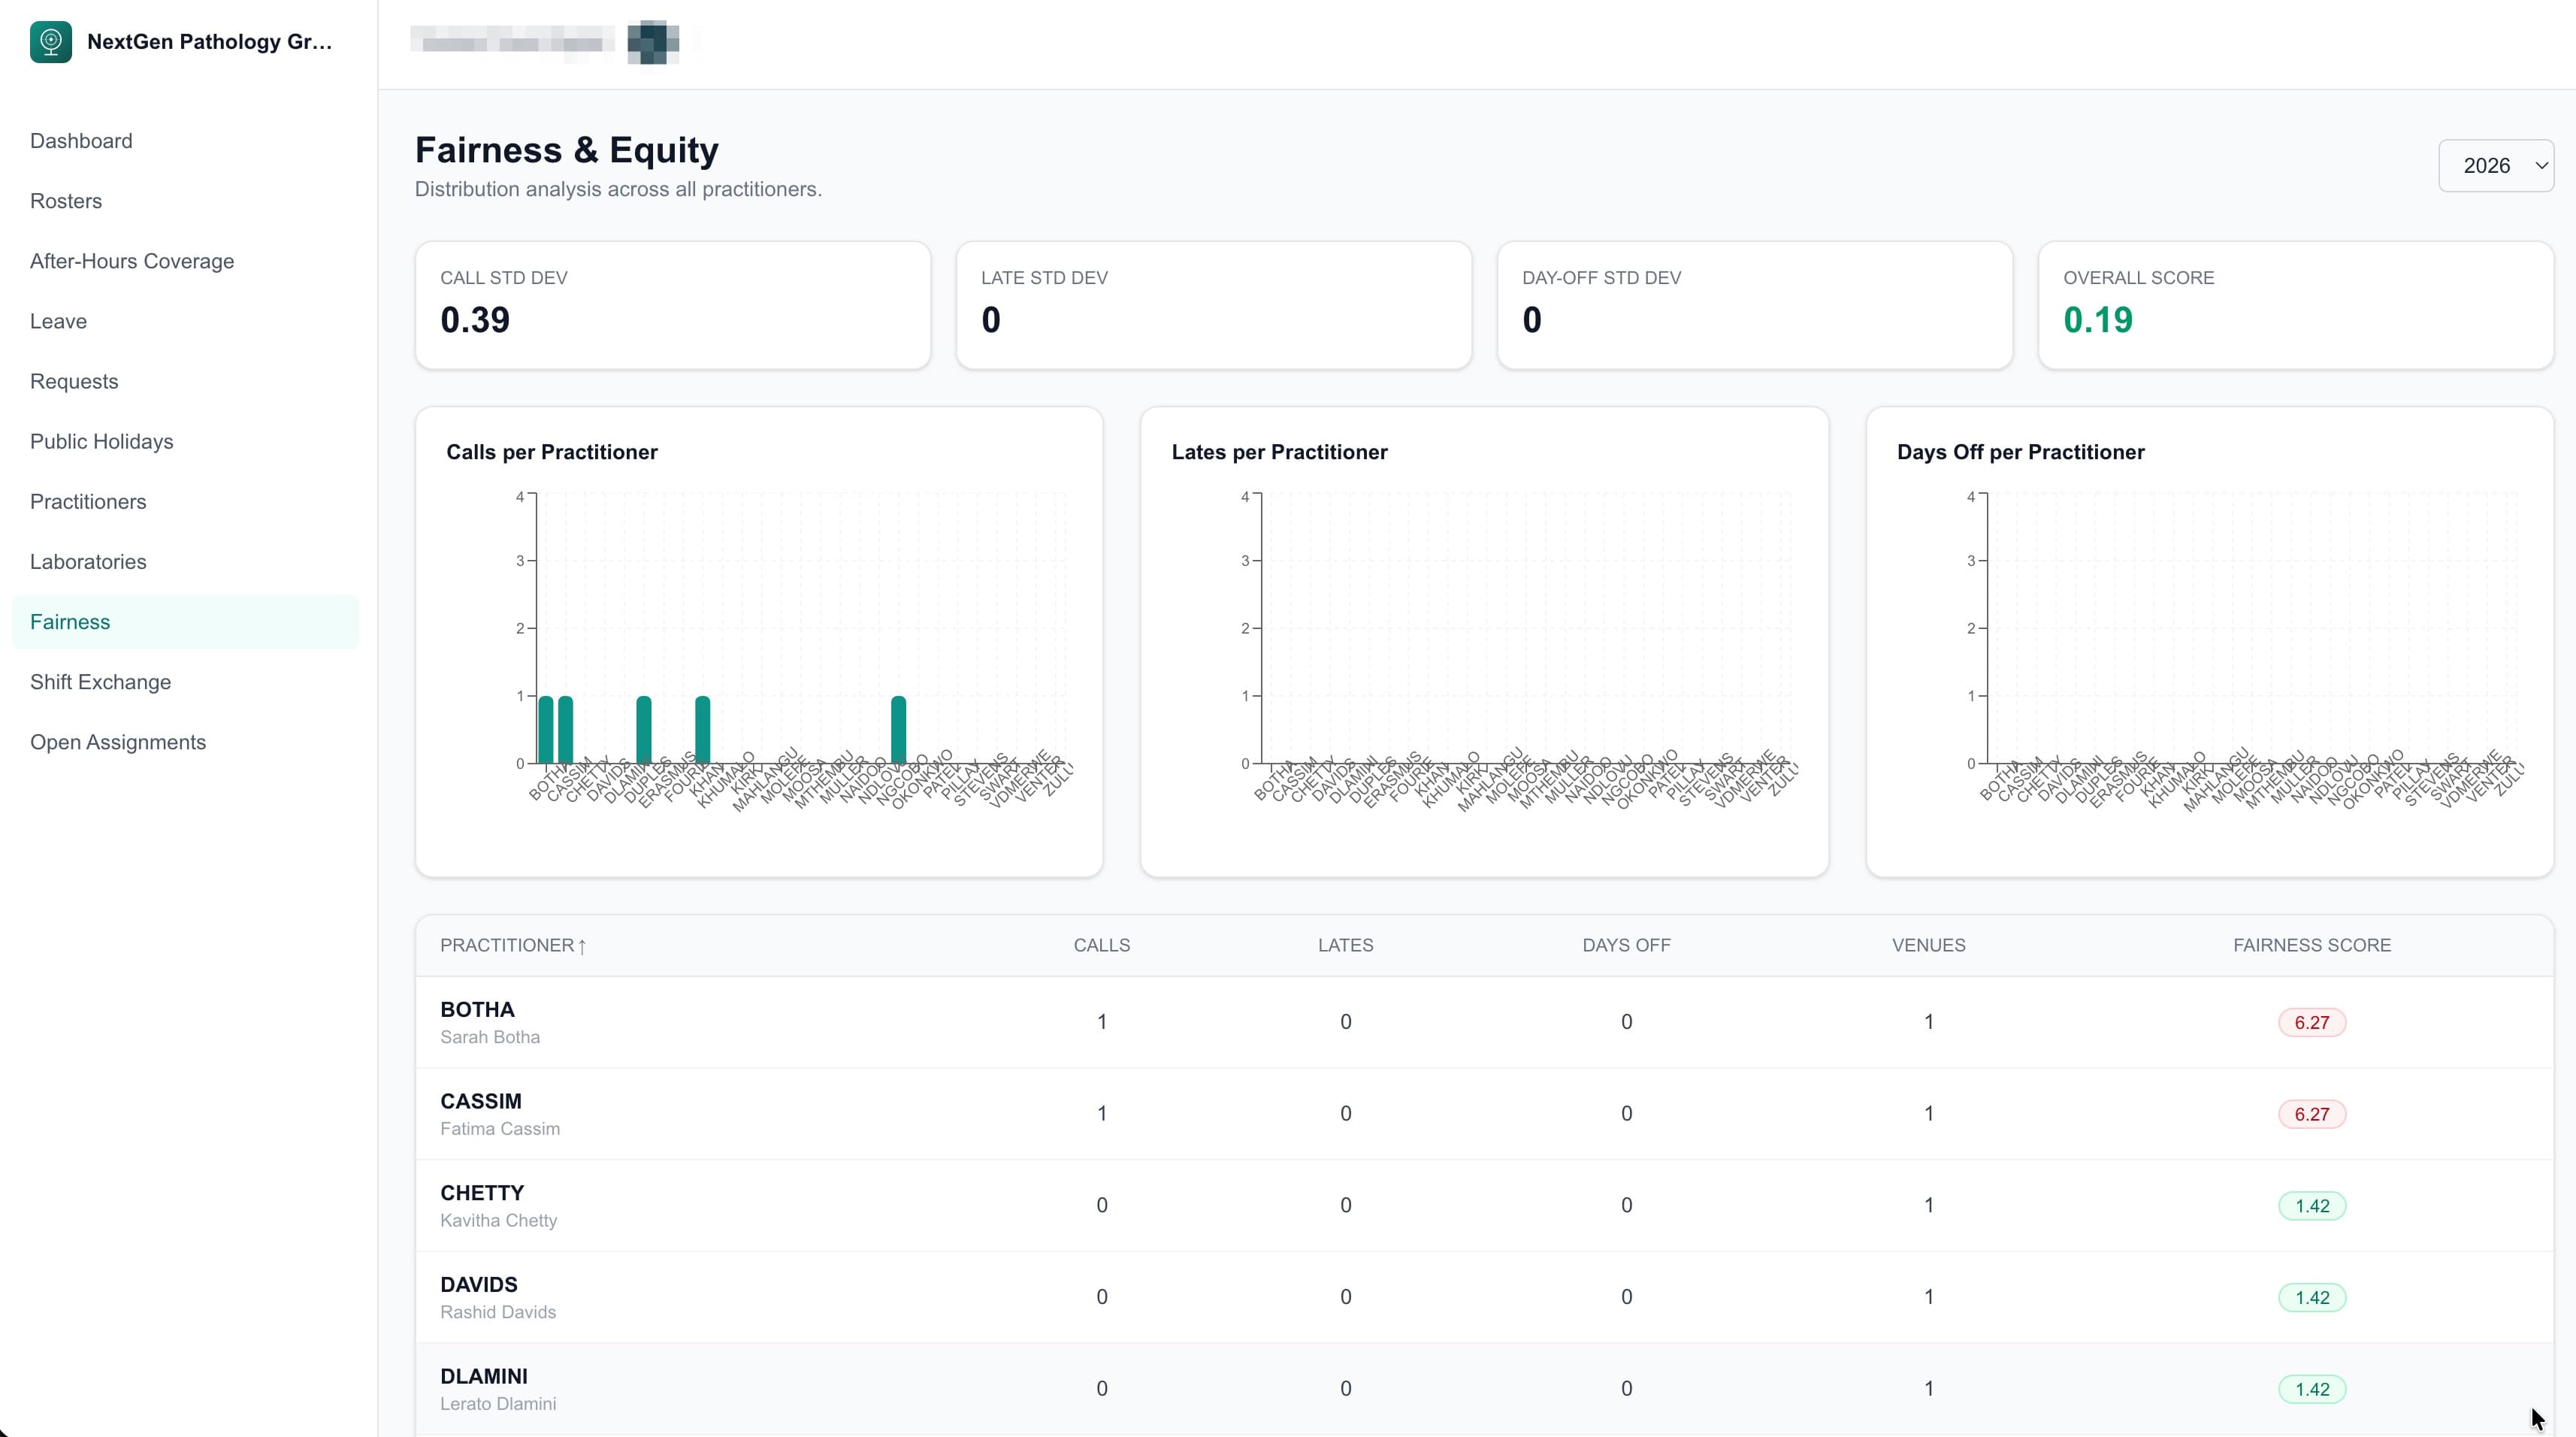
07
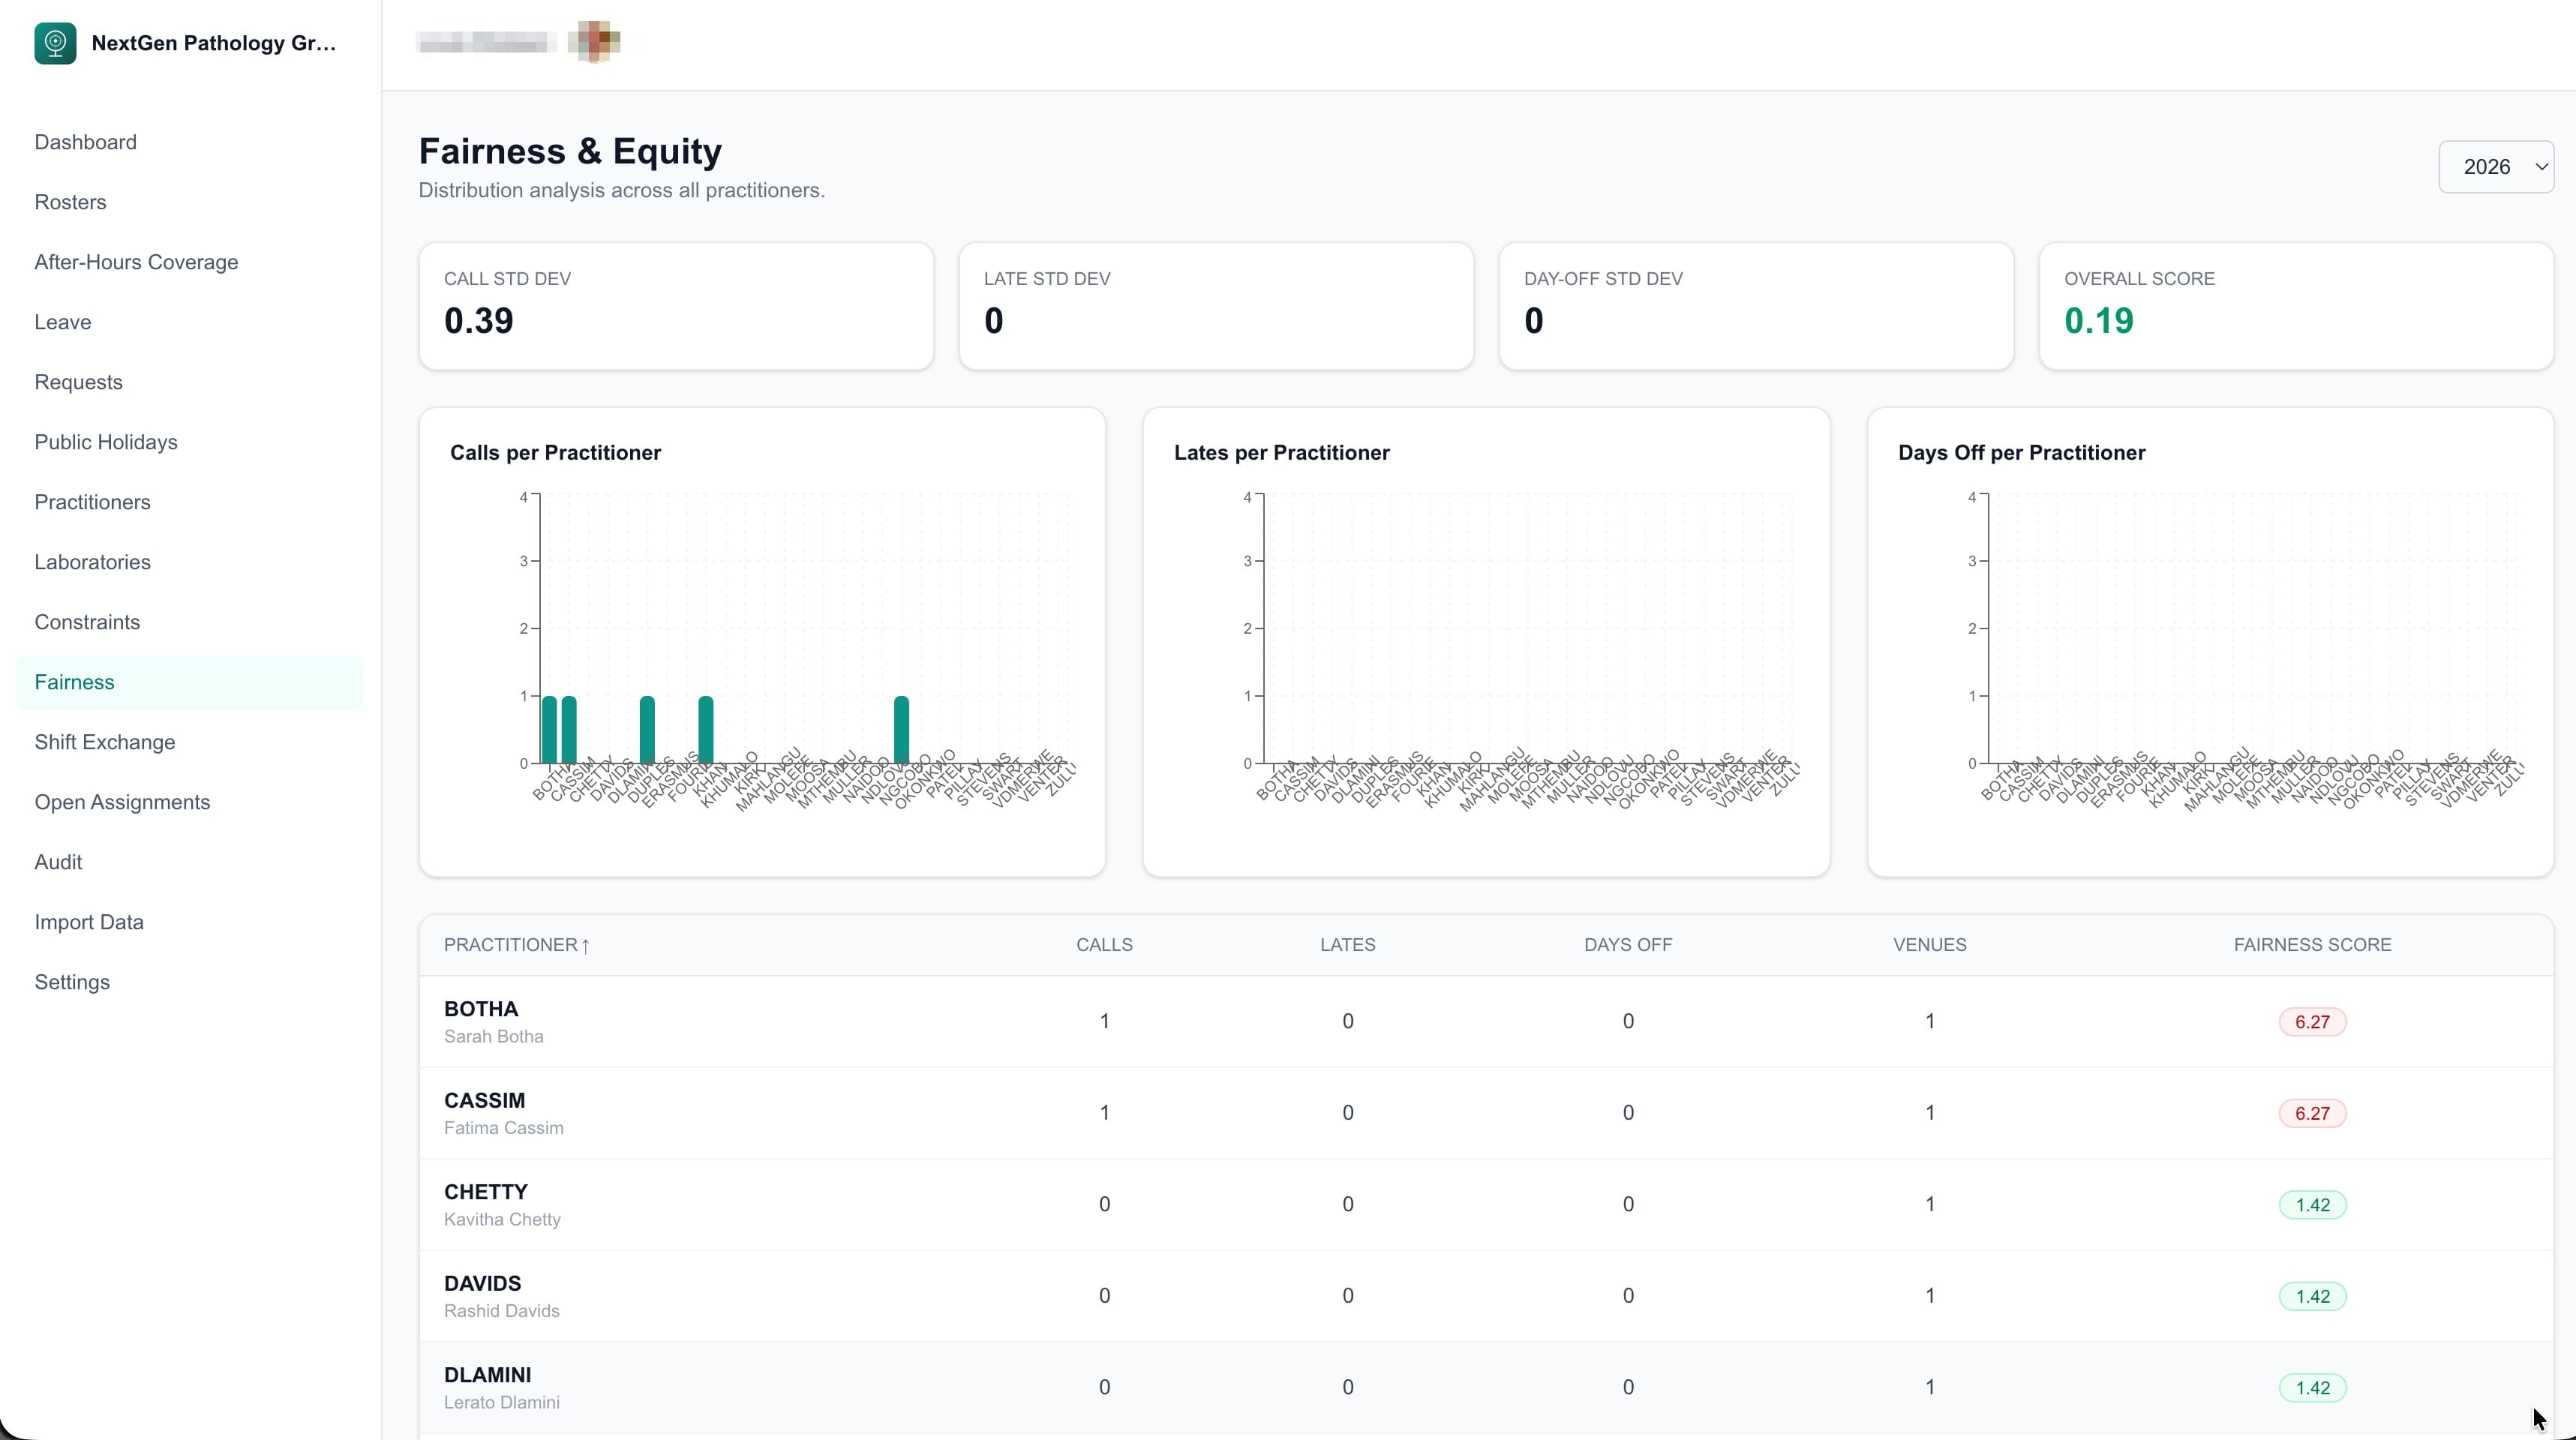
Fairness Dashboard
Track on-call, late shift and day-off distribution across your entire team. Visual charts and sortable tables make imbalances obvious. Both administrators and practitioners can see the same fairness data.
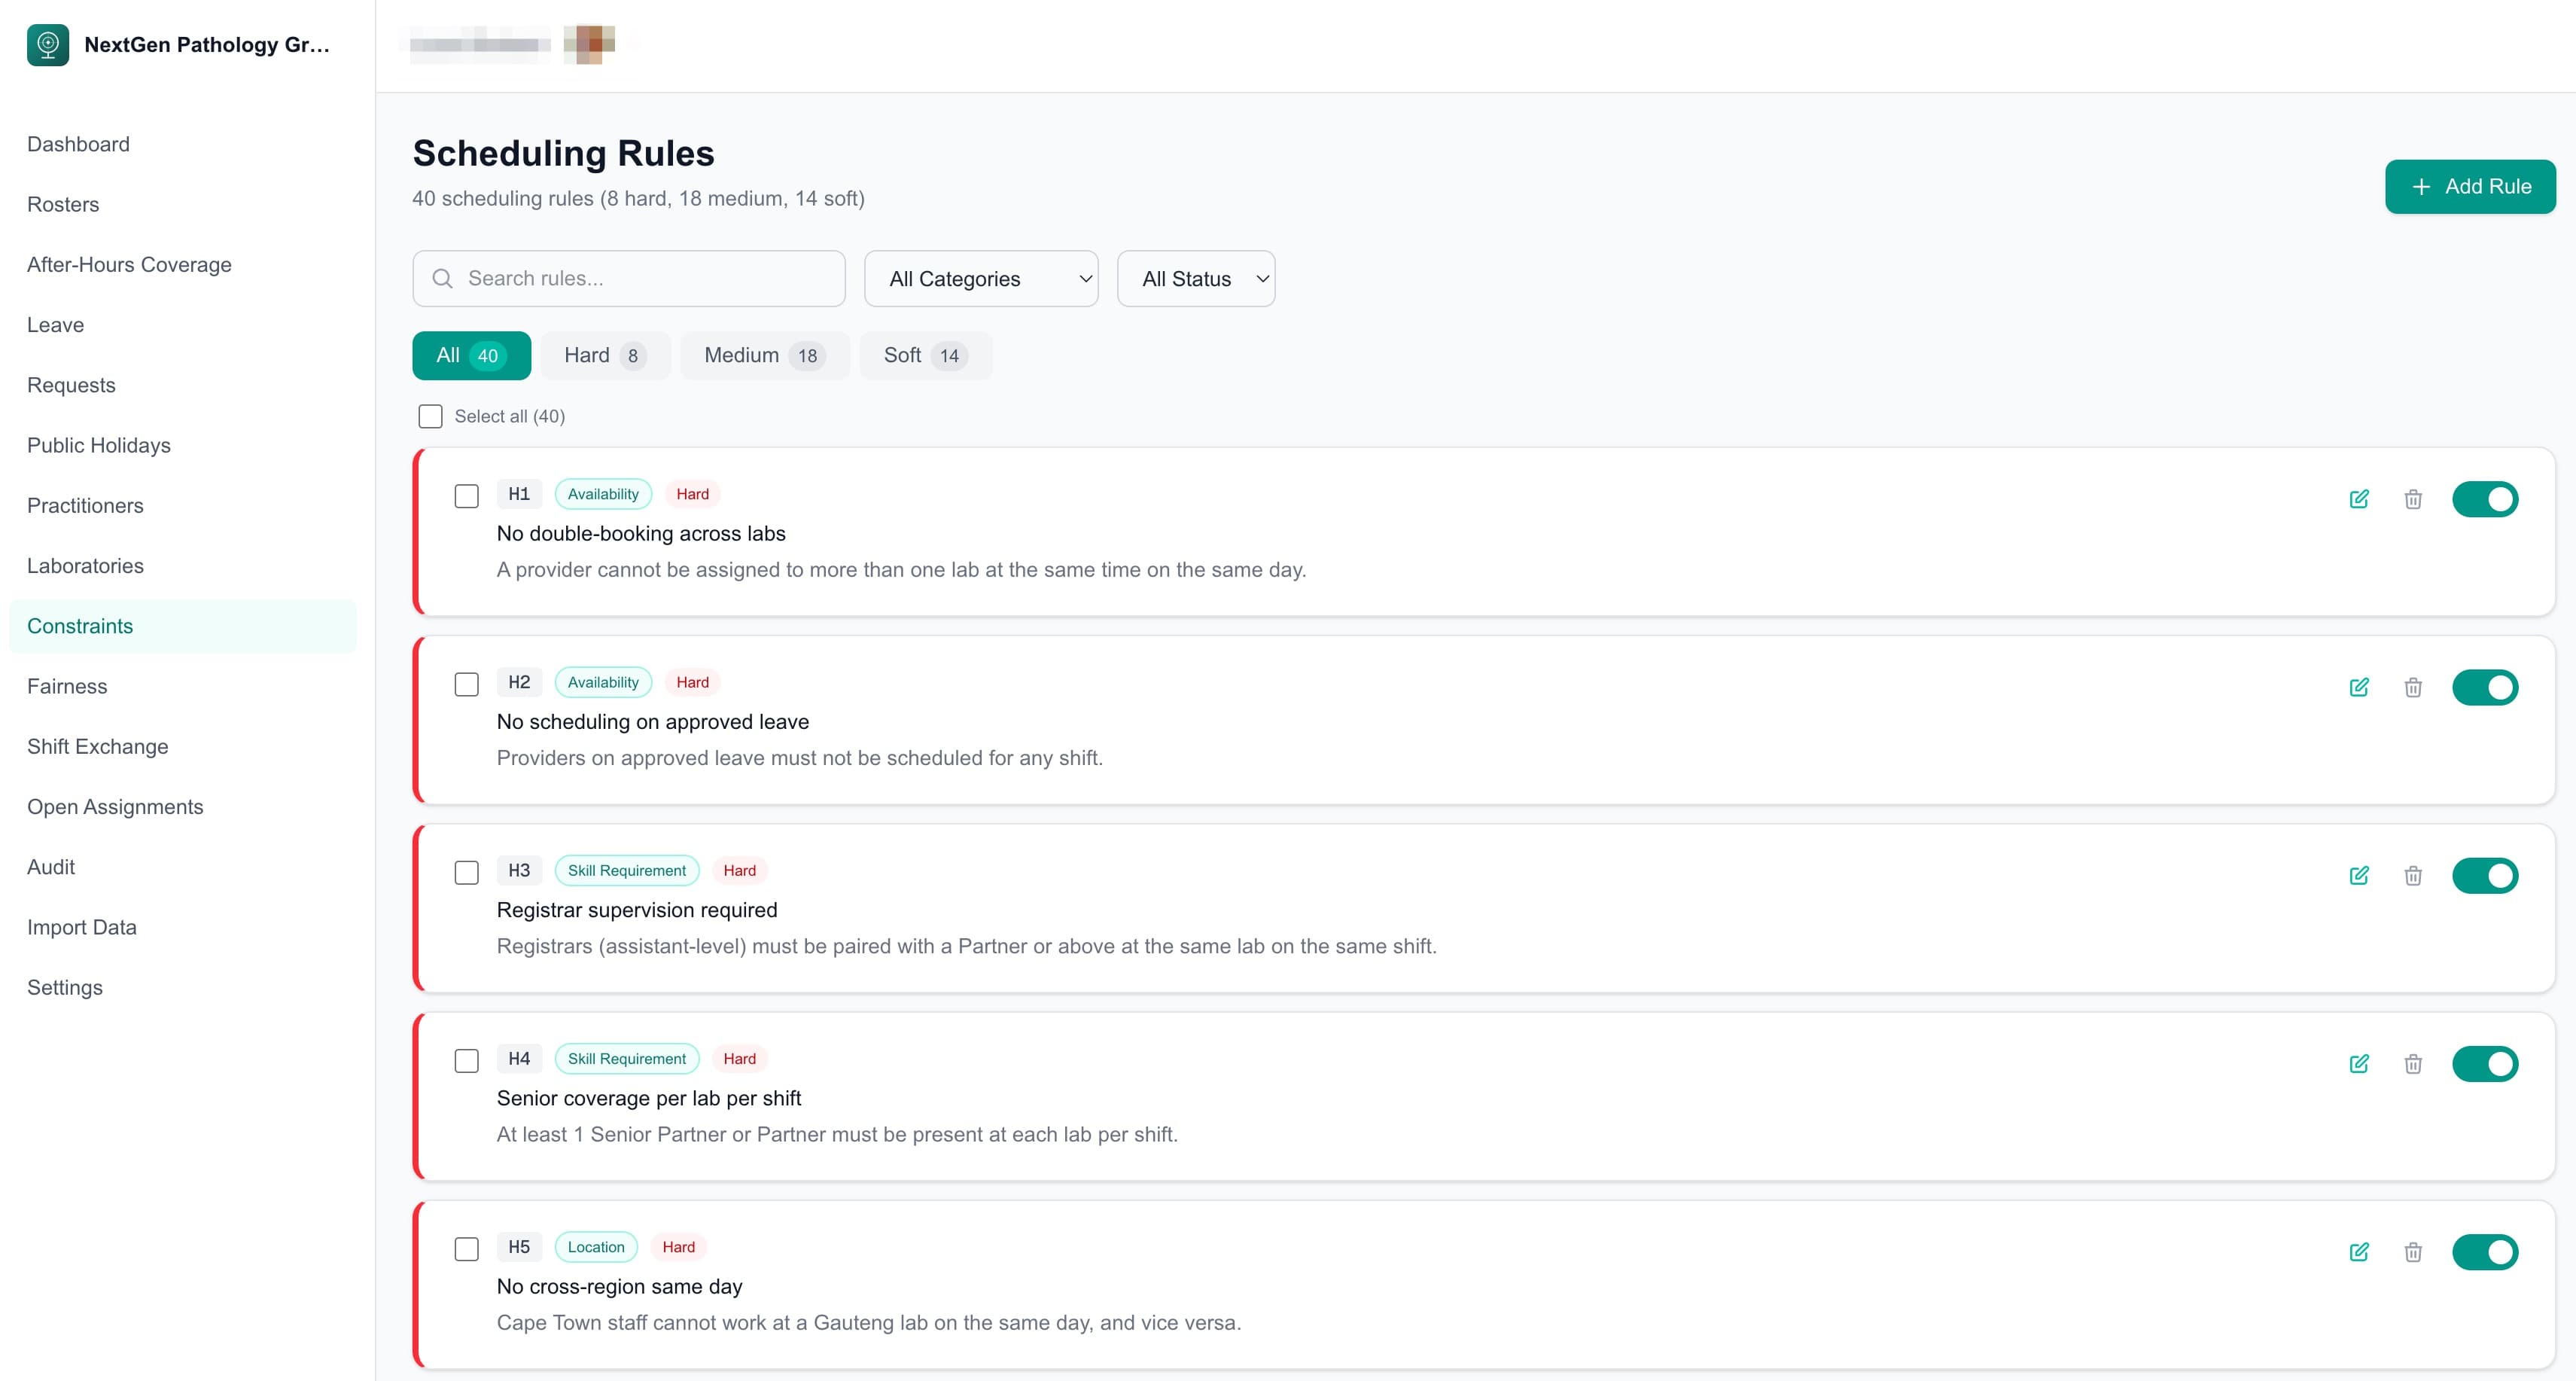
08
Scheduling Rules
40 scheduling rules across hard, medium and soft priorities. Search, filter by type and toggle rules on or off. Every rule is configurable, no code changes required.
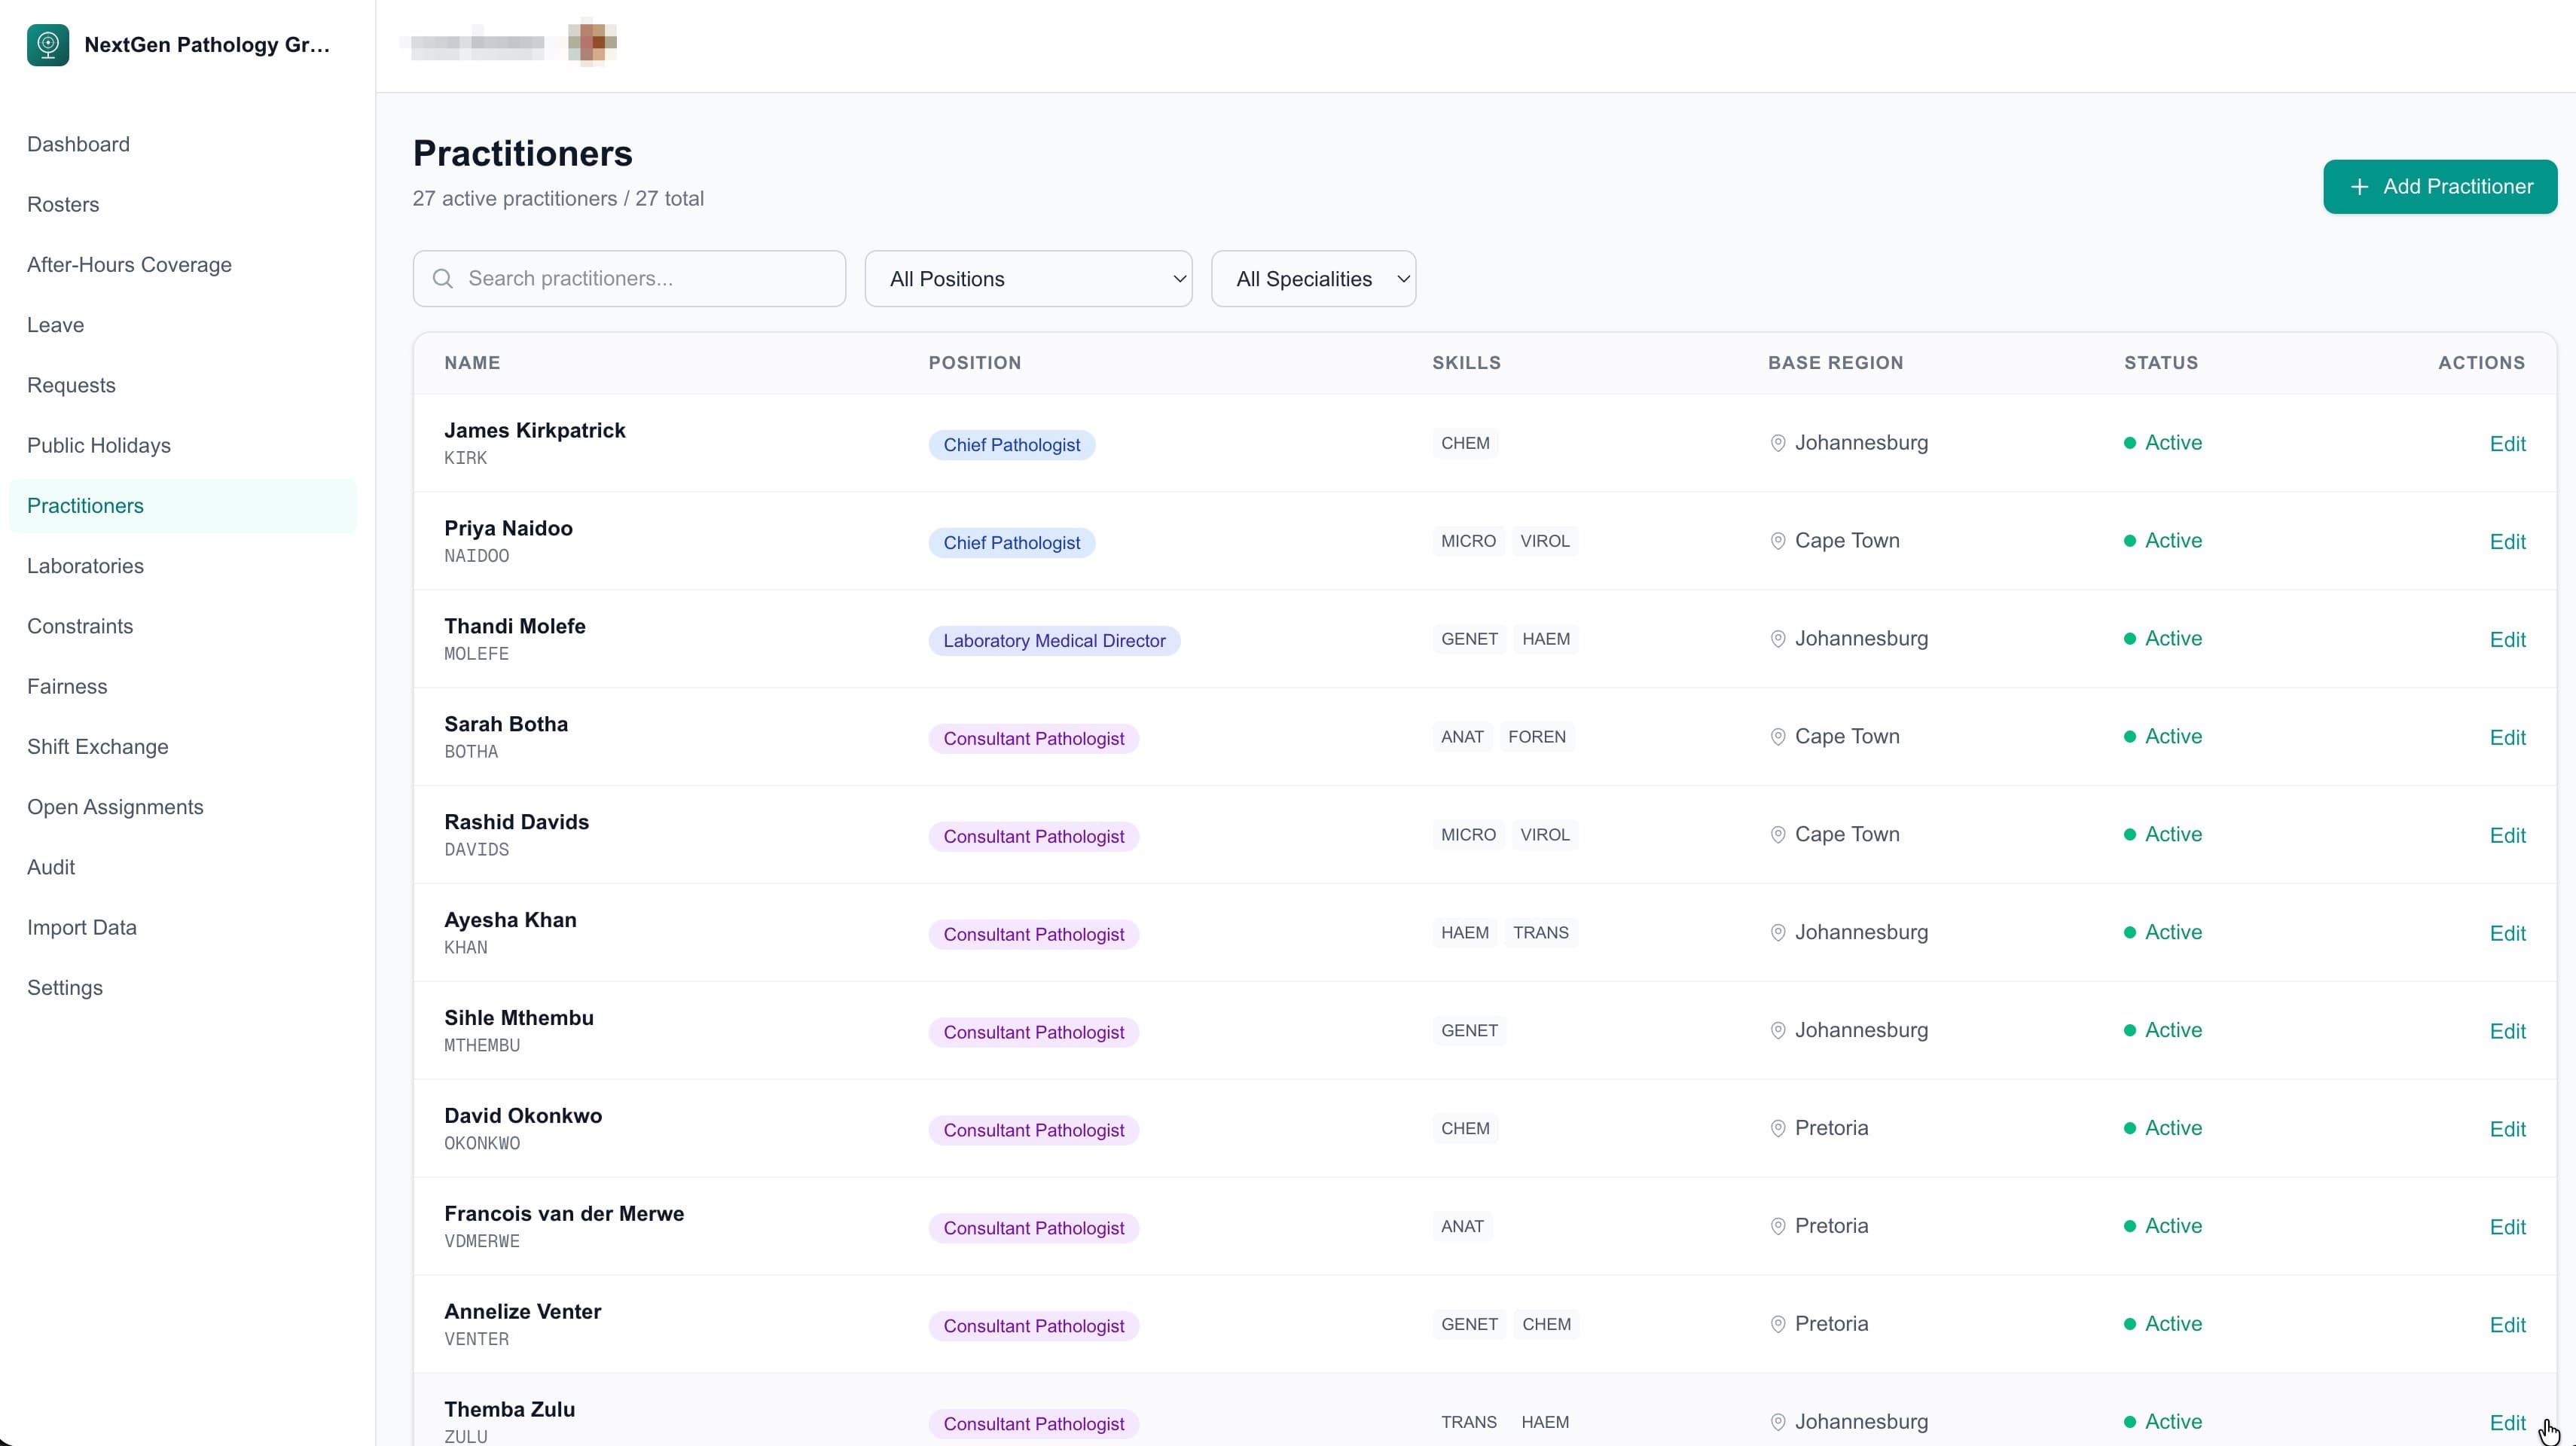
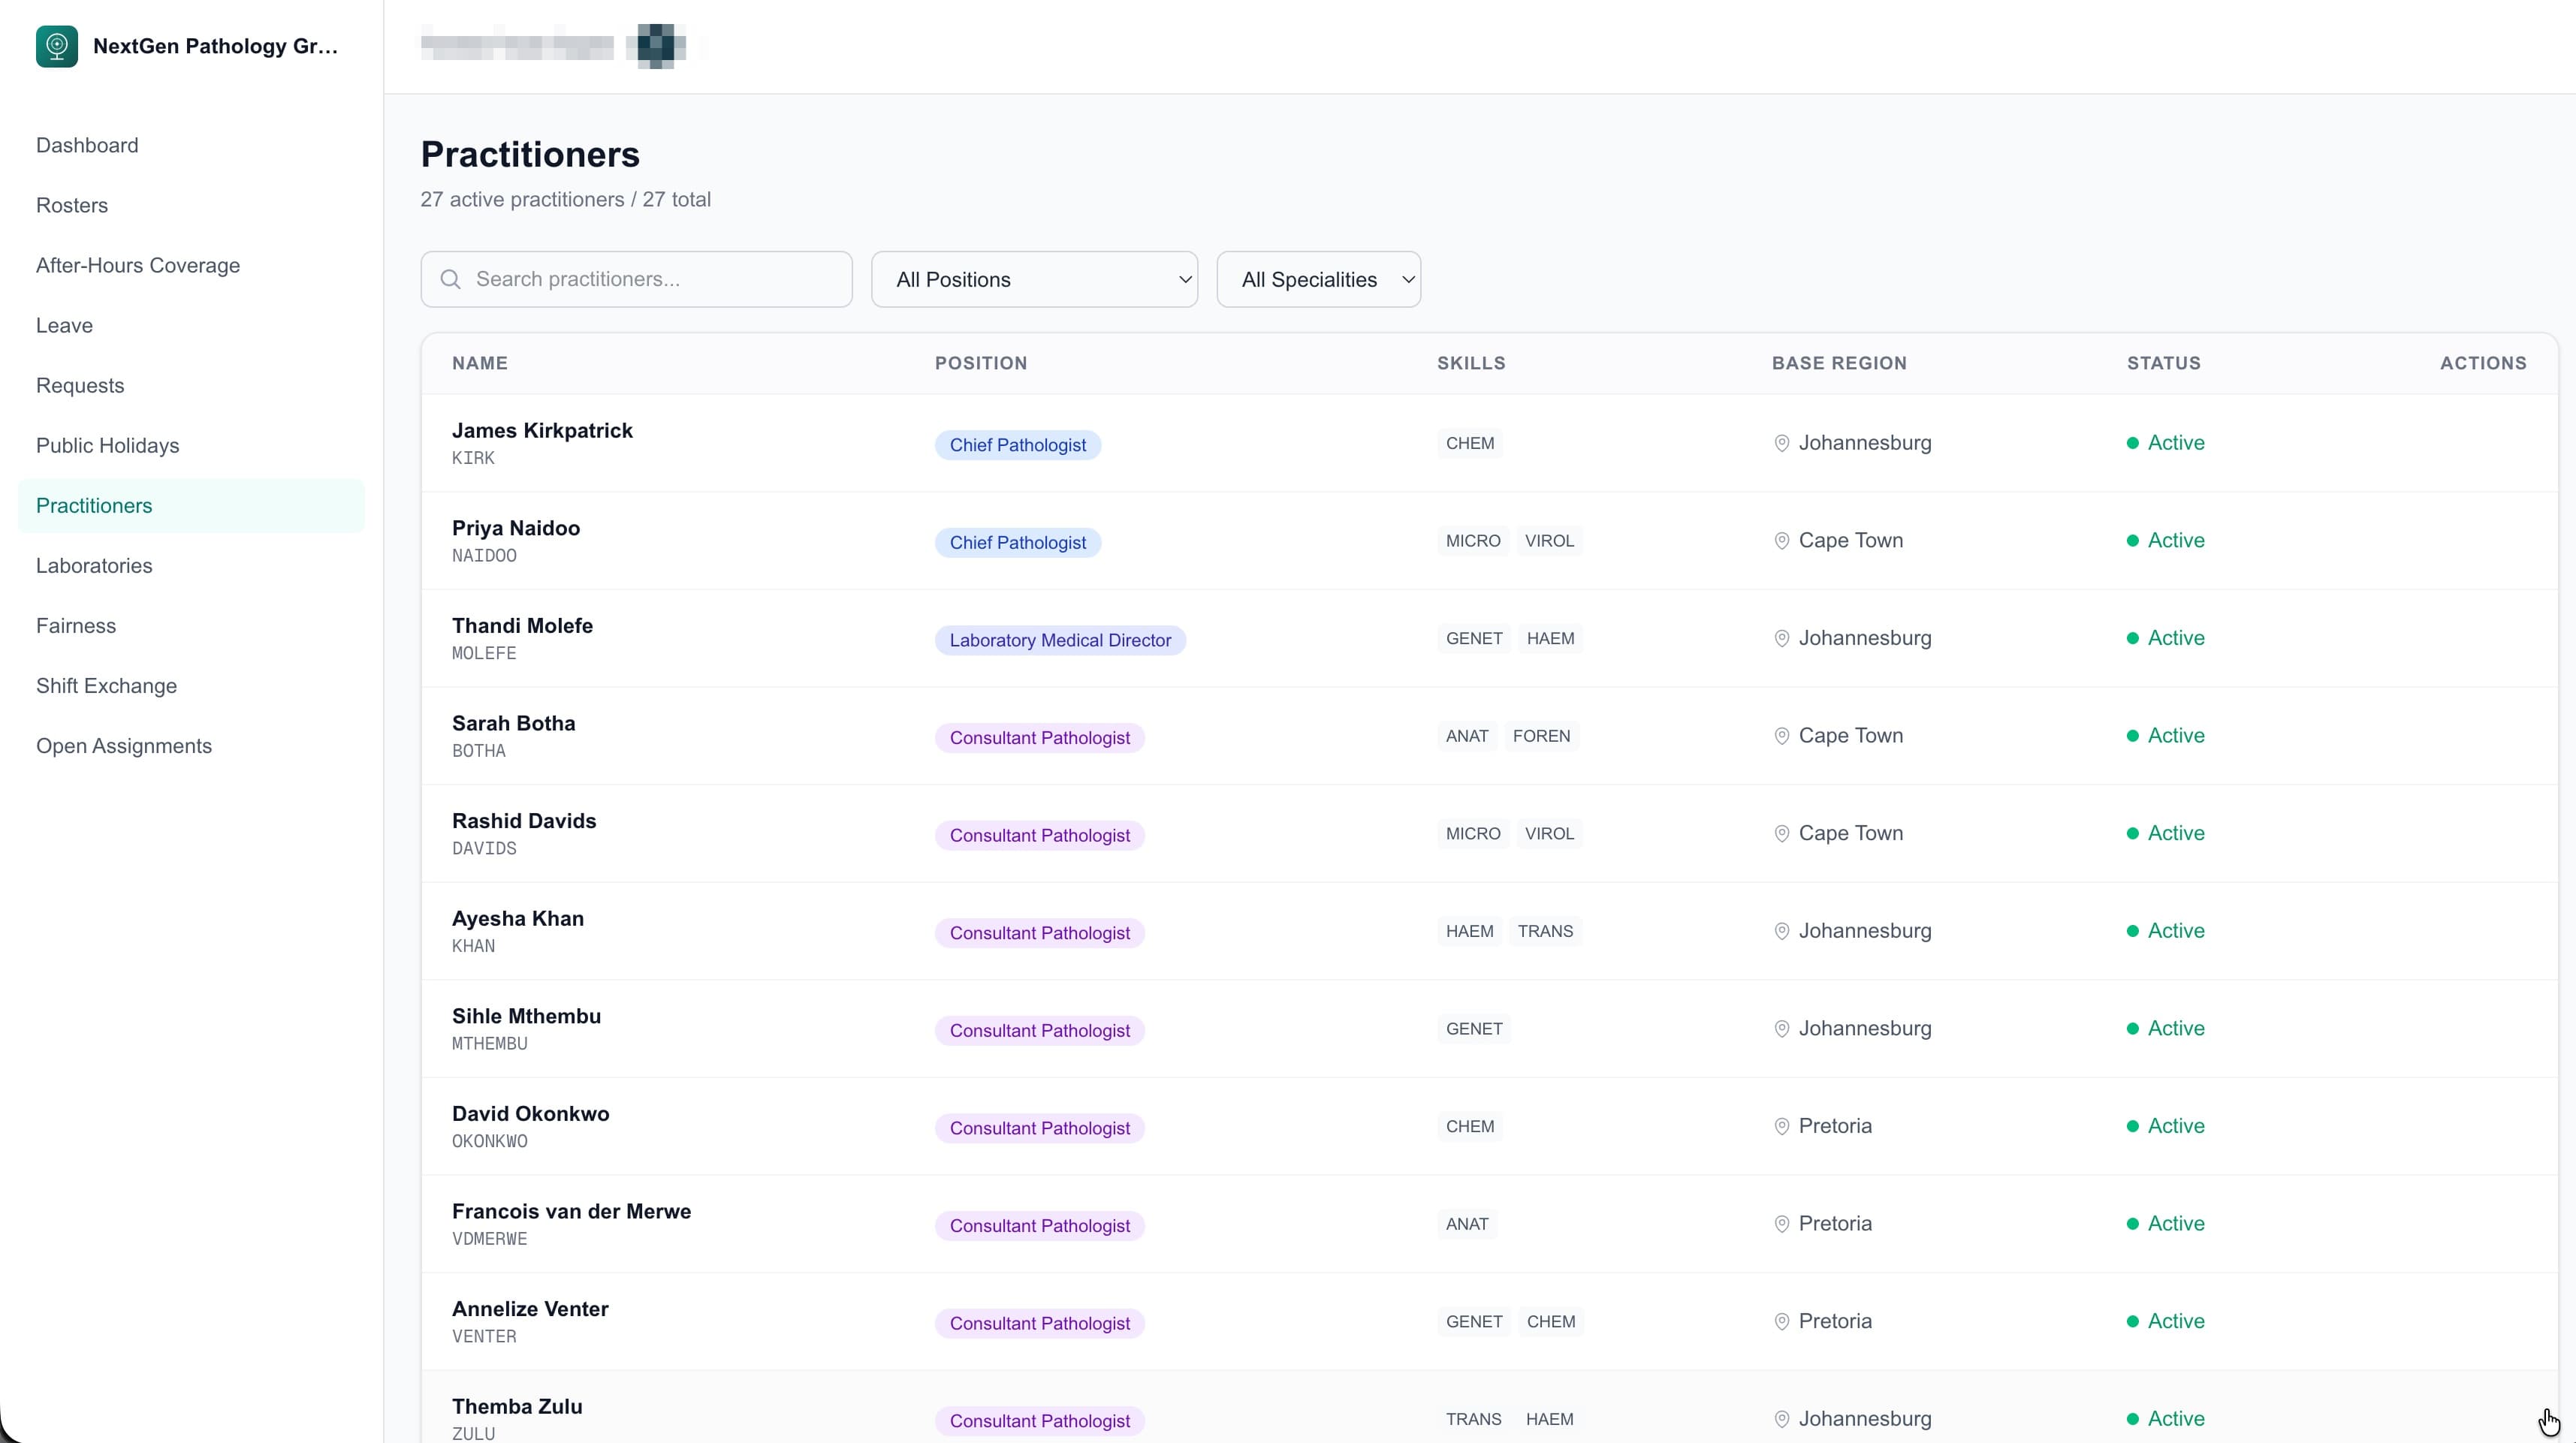
09
Team Management
Manage your team with full visibility of positions, specialities, base regions and availability. Practitioners see a read-only directory. Administrators manage profiles and skills.
10
Two Perspectives, One Platform
Administrators see everything: generate, edit, validate, publish. Practitioners see their schedule, request swaps and view fairness data. Role-based access ensures everyone sees exactly what they need.
Ready to see it with your own data?
Book a 20-minute demo and we'll show you how Rostersmith handles your specific scheduling challenges.
Not ready for a demo? Download our brochure to share with your team.